インストール環境
Proxmox VE の CT に OS debian をインストールした LXCを準備した。
debian install PVE LXC
Helper-Scripts を使って PVE に Debian 12 LXC を簡単インストールする。
OpenLiteSpeed と WordPress のインストール
WebサーバーをLiteSpeed をつかった WordPress のウエブサイトを試してみたく、調べてみると、簡単にインストールするスクリプトを見つけた。
i-click install で、さっそく試してみた。
ワンクリックスクリプトを使用する
Install from One-Click Script <— スクリプトのあったページの外部リンク
ワンクリックスクリプトに、
Here are two ways that ols1clck is commonly used.
Install the following:
OpenLiteSpeed
LSPHP
MariaDB
WordPress
LiteSpeed Cache plugin
※ php は、LSPHP という Litespeed 用の php がインストールされるようです。 database は MariDB です。
インストールを実行
LXC の _> Console から次のコマンドを実行すると
# bash <( curl -k https://raw.githubusercontent.com/litespeedtech/ols1clk/master/ols1clk.sh ) -w
インストール時の標準出力
下のインストール画面が現れた。
この標準出力の情報はログイン時に重要になるので記録しておく。
※表示の アドレスは適当に。(セキュリティ上)
					  % Total    % Received % Xferd  Average Speed   Time    Time     Time  Current
                                 Dload  Upload   Total   Spent    Left  Speed
100 87784  100 87784    0     0   181k      0 --:--:-- --:--:-- --:--:--  181k
**********************************************************************************************
*                    Open LiteSpeed One click installation, Version 3.2                      *
*                    Copyright (C) 2016 - 2025 LiteSpeed Technologies, Inc.                  *
**********************************************************************************************
Current platform is DEBIAN12 debian bookworm.

Starting to install OpenLiteSpeed to /usr/local/lsws/ with the parameters below,
WebAdmin Console URL:     https://12.1.121.121:7080
WebAdmin username:        admin
WebAdmin password:        rQ8x1y...........
WebAdmin email:           root@localhost
LSPHP version:            84
MariaDB version:          11.4
Install WordPress:        Yes
WordPress HTTP port:      80
WordPress HTTPS port:     443
WordPress language:       en_US
Web site domain:          *
MySQL root Password:      xlVDPUm73vhAg............
Database name:            olsdbname
Database username:        olsdbuser
Database password:        FVTOYeLFx9iW...................
WordPress plus:           No
WordPress location:       /usr/local/lsws/wordpress (New install)
Your password will be written to file:  /usr/local/lsws/password

Are these settings correct? Type n to quit, otherwise will continue. [Y/n]  Y

Start OpenLiteSpeed one click installation >> >> >> >> >> >> >>
System update
Start setup OpenLiteSpeed
     - add litespeedtech repo
     - update list
     - Install OpenLiteSpeed
     - Install lsphp84
     - Setup lsphp symlink
End setup OpenLiteSpeed
Set OpenLiteSpeed Web Admin access.
     - Config php.ini
Install wp_cli
/usr/bin/php symlink exist, skip symlink.
Start setup virtual host config
     - Check existing port
     - Create wordpress listener
     - Insert wordpress virtual host
     - Create wordpress virtual host conf
End setup virtual host config
Avoid port 80/443 conflict.
Start Install MariaDB
     - Install software properties
     - Add MariaDB repo
     - Add MariaDB repo
     - Update packages
     - Install MariaDB
     - Start MariaDB
     - Set MariaDB root
End Install MariaDB
Start setup MariaDB
Finished MySQL setup without error.
End setup mysql
Start Download WordPress file
End Download WordPress file
Start Create WordPress config
Done Create WordPress config
Install Postfix
     - Config OpenLiteSpeed
Congratulations! Installation finished.
Please access http://server_IP:80/ to finish setting up your WordPress site.
Also, you may want to activate the LiteSpeed Cache plugin to get better performance.
End OpenLiteSpeed one click installation << << << << << << <<

Start auto testing >> >> >> >>
OK: test webAdmin page passed.
OK: test Example vhost page passed.
OK: test wordpress HTTP first page passed.
OK: test wordpress HTTPS first page passed.
End auto testing << << << <<
Thanks for using OpenLiteSpeed One click installation!
この画面は、このあとの設定をWEBブラウザのGUI画面で行うための username と password が記されていた。
OpenLiteSpeed 設定
OpenLiteSpeed の設定は、サーバーにWEBブラウザでアクセスして GUI で行うことができます。
設定画面はクライアントのWEBブラウザから
今は設定ページへログインできるか確認
インストール画面で表示された標準出力の情報から、
OpenLiteSpeed のインストールディレクトリは、
/usr/local/lsws/
ということになる。
					Starting to install OpenLiteSpeed to /usr/local/lsws/ with the parameters below,
WebAdmin Console URL:     https://12.1.121.121:7080
WebAdmin username:        admin
WebAdmin password:        rQ8x1y...........
WEBブラウザからURL、
https://12.1.121.121:7080
にアクセスして、
username: admin
password: rQ8x1y………..
でログインすれば良いということだが、
URL(https://12.1.121.121:7080) は、グローバールの IP アドレスを表示したので、ローカルからアクセスする場合は、インストールしたサーバーのアドレスにする。
ex)
https://192.168.100.100:7080/

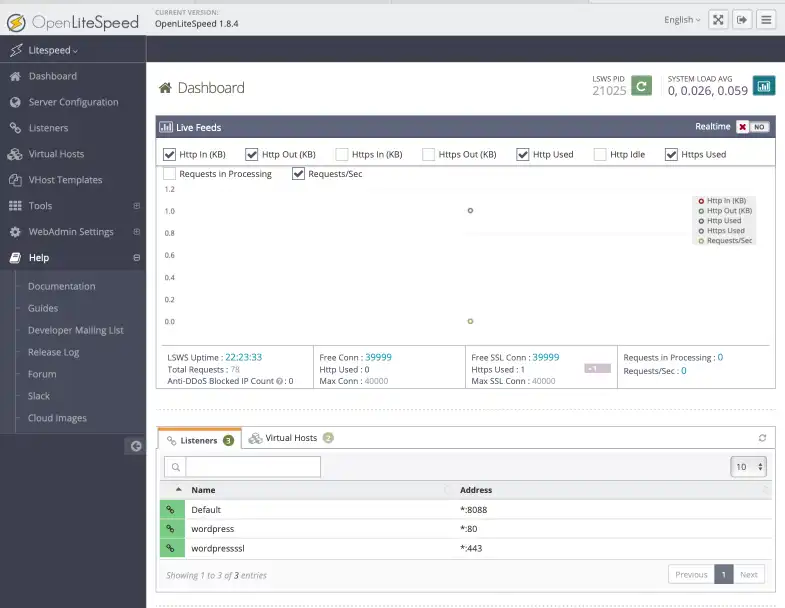
ダッシュボードにアクセスできたので、OpenLiteSpeed のインストールは成功のようです。
一応、日本語にも対応しているのが嬉しい。
WordPressのインストール画面の表示
WordPress にWEBブラウザっで表示できるか確認をします。
クライアントのWEBブラウザから
インストール時の標準出力画面から
WordPress HTTP port: 80
WordPress HTTPS port: 443
WEBブラウザからCMSワードプレスに「https」でアクセスしてみる。
Webサーバーの IP アドレスで
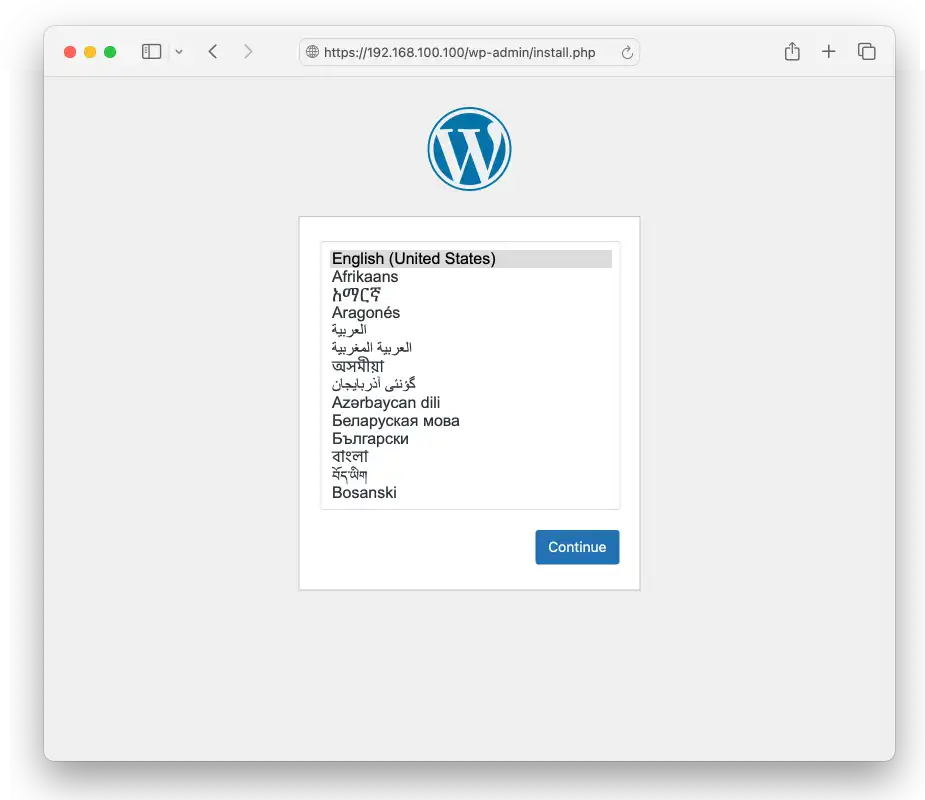
https://192.168.100.100/

WordPress の最初の設定画面、インストール画面が表示される。
スゴイですね!
WordPress にアクセスできることがわかったので、ここでまで。
Wordpressの設定をする前に、サイトのURLを設定しましょう。
Open LiteSpeed WordPress バーチャルホスト設定
UELをドメイン名でアクセスできるように、バーチャルホストとリスナーの誠意亭をする。


